 Save to Pinterest
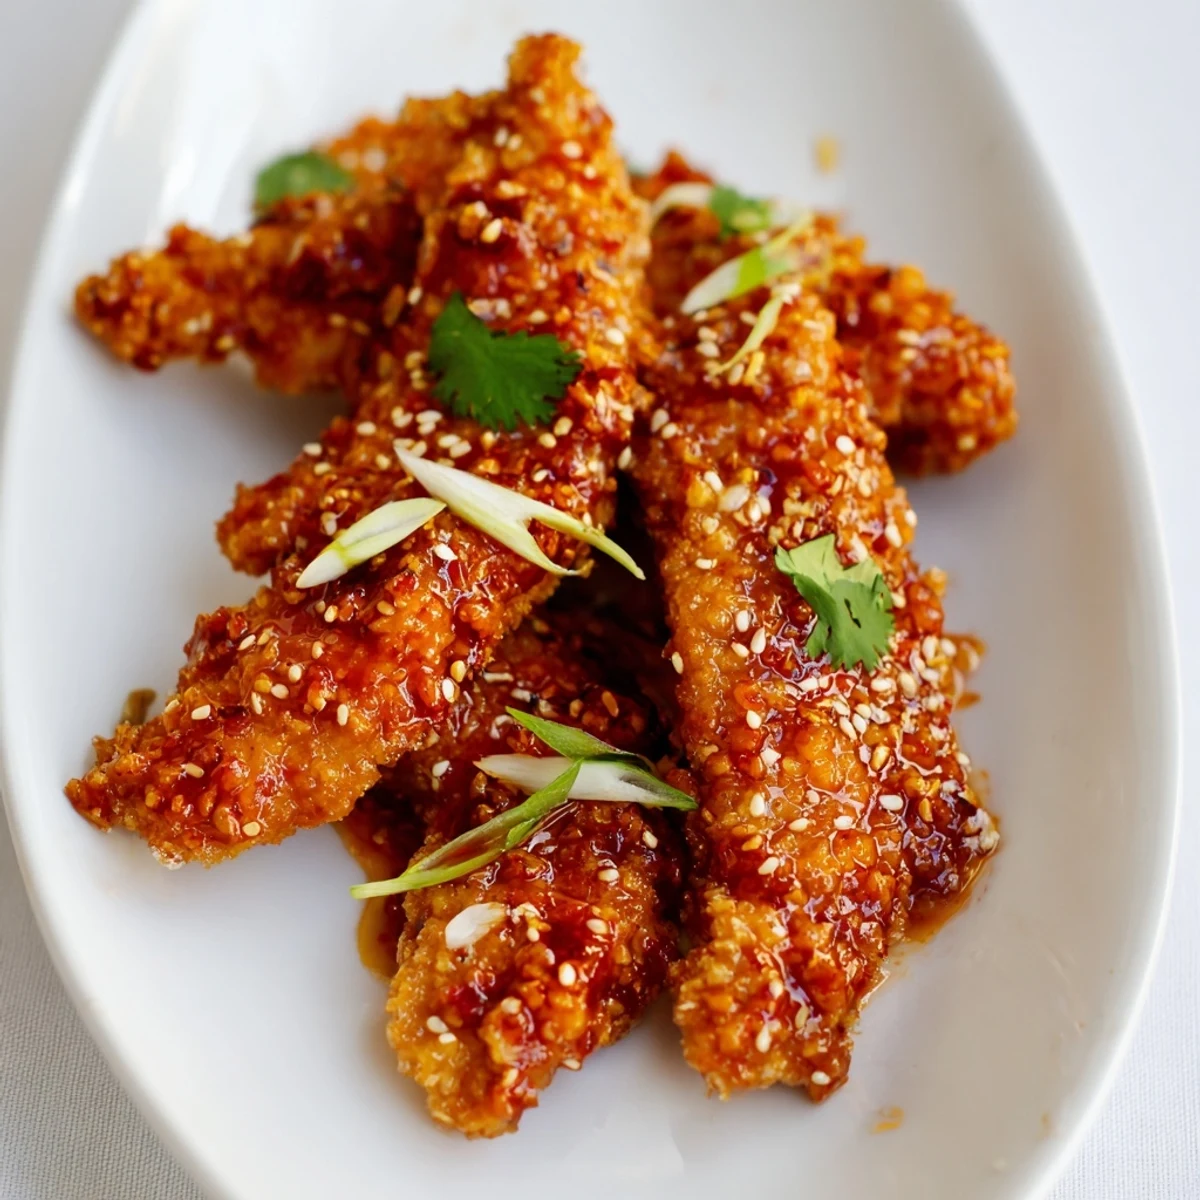
 These chicken fingers start with tender strips coated in a seasoned panko crust, baked until golden and crispy. The magic happens when they're tossed in a warm sticky sauce made from sweet chili, soy sauce, honey, garlic, and ginger. The result is perfectly balanced flavors—sweet heat from the chili sauce, savory depth from soy, and aromatic brightness from fresh ginger and garlic.
The coating stays crunchy even after saucing, while the chicken remains juicy inside. Finished with toasted sesame seeds and fresh spring onions, these make an impressive appetizer or casual dinner. They're easy to customize—add more sriracha for extra heat or skip it for a milder version that everyone will love.
The first time I made these sticky chicken fingers, my kitchen smelled like garlic and sesame oil for days. My roommate kept poking her head in, asking if they were ready yet. We ended up eating them straight off the baking sheet, burning our fingers because we couldn't wait.
Last summer, I made a double batch for a backyard gathering and watched them disappear in under ten minutes. Someone actually asked for the recipe while still chewing. Now they're my go-to when I need to feed a crowd without spending hours at the stove.
Ingredients
- Boneless chicken tenders: Cutting breasts into strips works perfectly, just try to keep them evenly sized so they cook at the same rate
- Salt and pepper: Simple seasoning here, but don't skip it since the sauce is bold and the chicken needs a foundation
- All-purpose flour: This helps the egg wash cling to the chicken, creating that essential first layer of coating
- Large eggs: Beat them well until no whites are visible, otherwise your breading will patch unevenly
- Panko breadcrumbs: These Japanese breadcrumbs create the lightest, crunchiest coating, far superior to regular crumbs
- Garlic powder and smoked paprika: This duo infuses the breading with savory depth and a subtle smoky warmth
- Sweet chili sauce: The base of our glaze, providing that signature Thai sweetness and mild heat
- Soy sauce: Adds umami richness and saltiness to balance the honey and chili sauce
- Honey: Natural sweetness that helps the sauce achieve that gorgeous sticky consistency
- Rice vinegar: Just enough brightness to cut through the sugar and keep the sauce from becoming cloying
- Sesame oil: A little goes a long way, adding that unmistakable nutty aroma we associate with Asian cuisine
- Sriracha: Optional, but if you like heat, this adds a vinegary kick that lingers pleasantly
- Fresh garlic and ginger: Minced finely so they melt into the sauce rather than creating chunks in your glaze
- Toast sesame seeds: These add crunch and a beautiful contrast against the shiny glazed chicken
- Spring onions and cilantro: Fresh finishes that cut through the richness and make the platter look absolutely stunning
Instructions
- Get your oven ready:
- Preheat to 220°C and line a baking sheet with parchment, or give it a light coating of oil to prevent sticking
- Season the chicken:
- Sprinkle salt and pepper over both sides of your strips, letting them sit while you set up your coating station
- Set up three shallow bowls:
- Place flour in the first, beaten eggs in the second, and mix panko with garlic powder and smoked paprika in the third
- Coat each strip:
- Dredge in flour, shake off excess, dip in egg, then press firmly into the panko mixture until thoroughly coated
- Arrange and prep for baking:
- Place coated strips on your prepared tray, leaving space between them, then lightly spray or brush with oil for maximum crispiness
- Bake until golden:
- Cook for 20 to 25 minutes, flipping halfway through, until the coating is deep golden and chicken is cooked through
- Make the sticky sauce:
- Combine sweet chili sauce, soy sauce, honey, rice vinegar, sesame oil, sriracha, garlic, and ginger in a small saucepan
- Simmer to thicken:
- Bring to a gentle simmer over medium heat, stirring constantly, until slightly thickened, about 2 to 3 minutes
- Toss and serve:
- Transfer cooked chicken to a large bowl, pour warm sauce over top, and toss gently until each piece is glossy and coated
 Save to Pinterest
 My partner insisted these were restaurant quality the first time he tried them, which made me secretly proud. Now they're his most requested Friday night treat, and I always double the sauce because he loves extra for dipping.
Making Them Extra Crispy
After the chicken is done baking, I sometimes flip on the broiler for just two minutes. Watch it like a hawk though, that panko goes from golden to burnt faster than you'd expect. The contrast between that almost-too-crisp exterior and the tender chicken inside is worth the vigilance.
The Sauce Secret
I've learned that reducing the sauce too much turns it into candy rather than glaze. You want it thick enough to coat a spoon but still pourable. If it gets too thick, a splash of water or rice vinegar brings it back to the perfect consistency.
Serving Ideas That Work
These disappear fastest when served with something cool and crisp alongside. Sometimes I keep it simple with jasmine rice, other times I arrange vegetable sticks around the platter for color and crunch.
- Make extra sauce and serve it in a small bowl on the side for dipping
- Try them wrapped in lettuce leaves with fresh herbs for a lighter take
- Reheat leftovers in a hot oven, never the microwave, to preserve that crunch
 Save to Pinterest
 There's something deeply satisfying about finger food that feels special, and these have become my answer to everything from casual dinners to celebratory gatherings.
Frequently Asked Questions
- → Can I fry these chicken fingers instead of baking?
-
Yes, you can deep fry or shallow fry the breaded chicken strips in oil at 175°C (350°F) for 3-4 minutes until golden brown. Drain on paper towels before tossing with the sauce. Frying gives extra crunch but baking is lighter and still yields crispy results.
- → How do I store and reheat leftovers?
-
Store cooled chicken in an airtight container in the refrigerator for up to 3 days. Reheat in a 200°C (400°F) oven for 10-12 minutes to restore crispiness. Microwaving will make the coating soggy, so the oven or air fryer is recommended for best results.
- → Can I make the sauce ahead of time?
-
Absolutely. Prepare the sticky sauce up to 5 days in advance and store it in the refrigerator. Reheat gently in a saucepan or microwave until warm and pourable before tossing with the freshly cooked chicken. The sauce actually develops deeper flavor after sitting.
- → What can I serve with these chicken fingers?
-
These pair wonderfully with steamed jasmine rice, noodles, or fresh vegetable crudité. They also work well alongside a simple cucumber salad with rice vinegar dressing. For drinks, a chilled Riesling, light lager, or even a crisp IPA complement the sweet-spicy flavors beautifully.
- → How can I make this gluten-free?
-
Replace the all-purpose flour with a 1:1 gluten-free flour blend. Use certified gluten-free panko breadcrumbs and tamari instead of soy sauce. Double-check that your sweet chili sauce is gluten-free, as some brands contain wheat-based thickeners. The rest of the ingredients are naturally gluten-free.
- → Can I use chicken thighs instead of breasts?
-
Yes, boneless skinless chicken thighs work excellently and tend to be juicier than breasts. Cut them into strips and follow the same baking time. You may need to bake an extra 2-3 minutes to ensure they're cooked through. thighs add more richness and stand up well to the bold sauce flavors.
